

Page speed is one of the few ranking factors publicly confirmed by Google.
Which means… speeding up your website can get you more search traffic.
And it’s not just traditional SEO that benefits. Faster websites are also easier for AI crawlers to access, which can improve your chances of being featured in AI-generated answers – an emerging field known as Generative Engine Optimization (GEO).
(And as a bonus… speeding up your site can also reduce your bounce rate, lead to more repeat traffic, and even boost your bottom line!)
The good news? This guide is PACKED with actionable page speed optimization tips you can implement TODAY.
Let’s dive straight in.
Why page speed optimization is so important
The speed at which a webpage loads has a major impact on how both crawlers and users interact with the page.
A slower page load will result in a higher bounce rate and fewer conversions for your users. This is especially true for mobile users or those with worse internet connections, since slow load times have the biggest impact on these groups.
And when it comes to crawlers, a slower loading speed can have a negative impact on indexing too. This is true for both regular search engine crawlers (SEO) as well as for LLMs like ChatGPT (so-called “Generative Engine Optimization” (GEO)).
Needless to say, a good page speed is vital to the health of your website.
How to check your page speed
Before starting optimization, you’ll need a baseline.
And while there are several cool tools for measuring page speed — shoutouts to GTMetrix and Pingdom — Google’s own PageSpeed Insights has everything you need to measure current performance.
PageSpeed Insights has a load of useful metrics. But let’s keep things simple. What you want to note is:
- Your page’s mobile speed score (0-100)
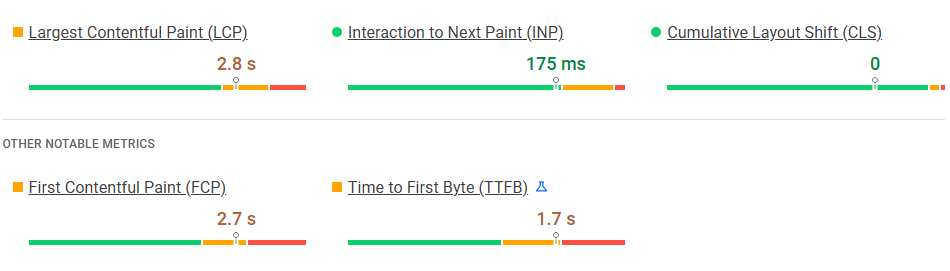
- Your page’s ‘Largest Contentful Paint’ (LCP) and ‘Interaction to Next Paint’ (INP)
Note: we recommend focusing on mobile page speed as Google uses mobile-first indexing, and using the Core Web Vitals report if it shows for your benchmark.
For example, the Seobility home page currently has a mobile speed score of 82…
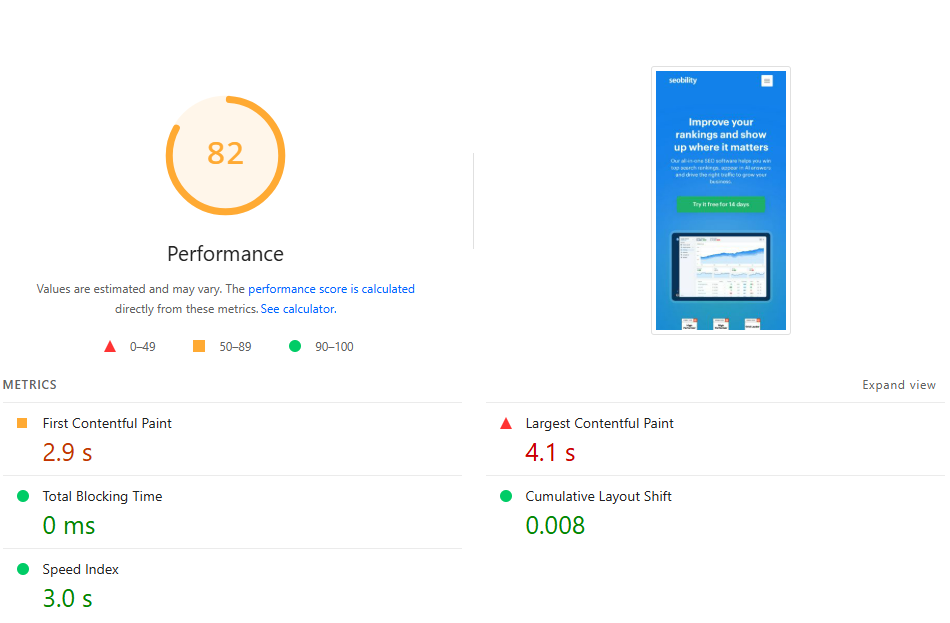
…a Largest Contentful Paint of 4.1s and an Interaction to Next Paint of 175 ms.
In case you’re wondering, it could use some improvement, and we’re working on it!
So what IS a good speed score?
In general, you want to aim for a score of between 90 and 100.
That’s what Google counts as good.
For INP, 200 ms or below is considered good, with 200-500 ms meaning it needs improvement and anything above 500ms being considered poor.
For LCP, aim for under 2.5s.
There’s a lot more to say about this topic, though.
Check out our post on how fast your website should load for a more detailed look at this topic.
The basic principles of improving page speed
Before we get to the tips, let’s quickly cover what we’re trying to achieve.
In a nutshell:
Every action we take to improve page speed is designed to do one of the following:
- Improve the execution time on the server-side or reduce the server response time (improve the Time to First Byte or TTFB)
- Reduce the size of and/or the time it takes to render a page on the server side and send web content to the client browser
- Reuse content and/or resources to save on download time
- Reduce the execution/evaluation time of a page on the client-side
And every tip below hits on one of these goals.
So let’s press on…
Note: This section mainly covers on-page and basic technical steps you can take to speed up your site. If you want to go even further, check out our guide on optimizing your server and infrastructure.
Technical and on-page tips for boosting page speed
In this section, we’re going to cover 12 speed-boosting tips for your website, from setting up page caching to optimizing images, scripts, styles, and more.
1. Set up page caching
Difficulty: Easy to intermediate (for most CMS systems this can be handled with a plugin)
Why should you do it?
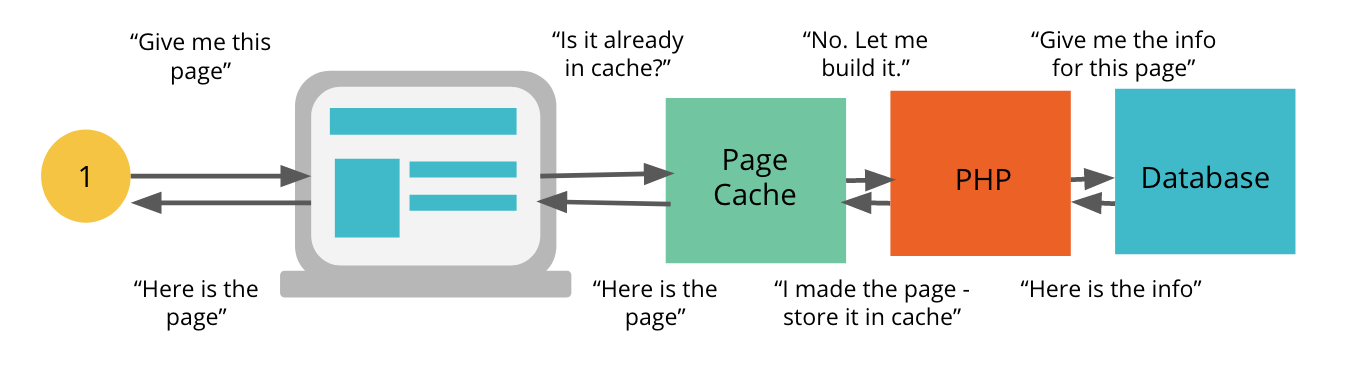
Dynamic websites work by storing content (an article, a product, etc.) in a database (separate from the main template) and then creating a full page “on the fly” when a user visits.
But fetching content from a database for every visitor is an extremely resource-heavy operation.
Page caching fixes this problem.
Caching creates a copy of the full page (i.e., template with content) the first time it is rendered and stores it on the local disk of the server. This cached version can be retrieved hundreds of times faster than if it were fetched from the database and rendered each time the page is loaded.
The cache is refreshed periodically, typically every few hours. Which ensures a good balance between having the latest content and optimal page-loading speed.
How to do it
On most CMS systems, you’ll want to let a plugin (or app) handle caching for you.
If you’re running WordPress, we recommend WP Rocket, which can also take care of lots of other page speed optimization tips on our list.
But there are also free plugins such as W3 Total cache.
You’ve also got plenty of choices on Shopify. For example, HyperSpeed is a good all-round page speed app.
Search for reviews of caching (and page speed) plugins for your chosen CMS.
2. Optimize your images and lazy-load them
Difficulty: Easy (most image editing programs can optimize for web + lazy loading is becoming native)
Why should you do it?
Images can help your website stand out from the crowd, make your content easier to scan (by breaking it up), and reduce bounce rate.
At Seobility, we create custom featured images for each of our blog posts.
But when not optimized, they can also seriously slow down your site.
How to do it
First, make sure your images are lazy-loaded. This is a feature where images are loaded ONLY when the user is about to see them (for example, when they are about to scroll that image into view).
If you’re running WordPress, then as long as you’re on version v5.4 or above (which everyone should be), lazy loading is built in. And as of v6.3+, smarter lazy loading functionality was added. So there’s not much to do in this case.
On other CMSs or fully custom-built websites, you might need to use a plugin or ask a developer to help you set it up.
Secondly, you need to make sure that the images you are using are optimized for the web.
Usually, this means that they are saved in a format that reduces their size without losing any of their quality.
There are several tools that can help you with this.
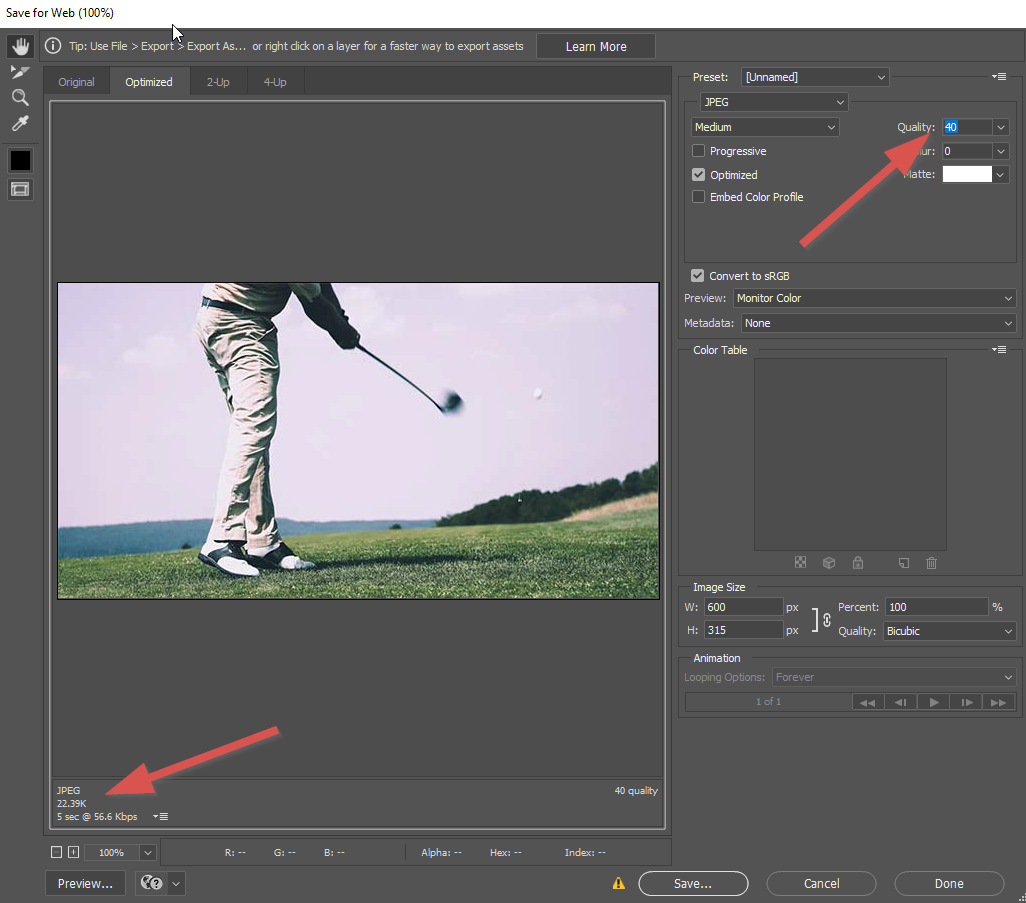
You can save images for the Web with most graphic design tools, such as Photoshop (below). Or you can use a tool such as TinyPNG to optimize images individually.
And if you want to handle image optimization directly on WordPress, you can use a service such as WPMU’s Smush, or Imagify.
3. Use next-gen formats such as WebP
Difficulty: Intermediate (converting images to WebP is easy, but serving them will take a little tweaking)
Why should you do it?
We know that we need to optimize images. But what image format is a good compromise between quality and size?
PageSpeed Insights recommends WebP. This is a lossless image format that has been designed specifically for the web.
What does lossless mean?
Formats such as JPG typically “lose” some of the image quality to make their file sizes smaller. Lossless image formats such as PNG and WebP do not compromise quality for size.
How to do it
Plugins such as Imagify (mentioned above) or WebP Express can convert your media to WebP, then use this format for displaying images.
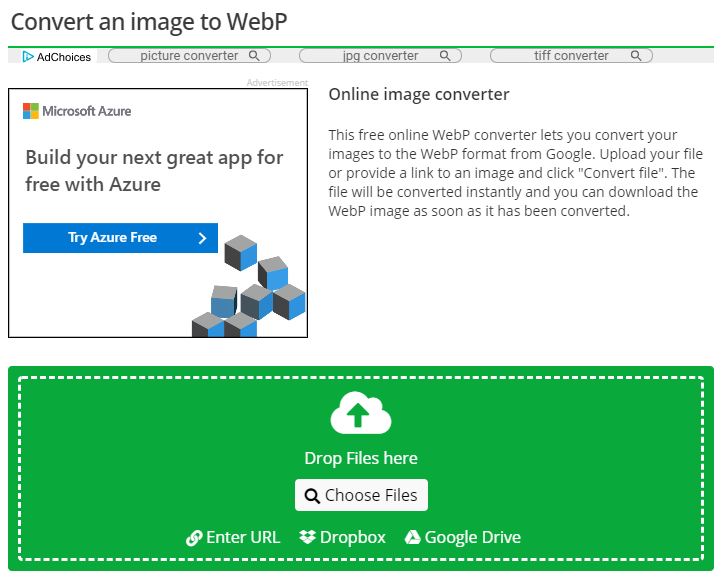
You can also use this free tool to convert your images to WebP manually.
Further reading: A new image format for the Web (Google Developers)
4. Enable GZip compression
Difficulty: Easy (a small tweak to config)
Why should you do it?
Much of a website’s content is textual. For example, HTML, CSS, and JavaScript are all text.
This gives us an easy performance win. Because textual content is highly compressible.
And when content is compressed, there is less of it to transfer, making it significantly faster to load.
Note: while there is a small impact of compressing and decompressing content, there is a much larger benefit to reducing the transfer size.
How to do it
Enabling GZip compression can typically be done through your hosting service. On cPanel-based hosts, you need to find the Optimize Website section and enable it as below.
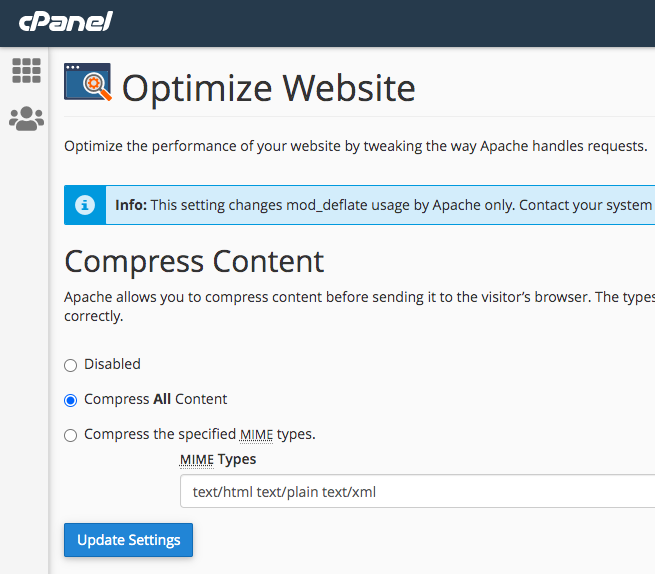
Alternatively, you can add a short code snippet to your .htaccess file as seen below:
<IfModule mod_deflate.c>

# Enable compression for common content types
AddOutputFilterByType DEFLATE text/html
AddOutputFilterByType DEFLATE text/plain
AddOutputFilterByType DEFLATE text/xml
AddOutputFilterByType DEFLATE text/css
AddOutputFilterByType DEFLATE text/javascript
AddOutputFilterByType DEFLATE application/javascript
AddOutputFilterByType DEFLATE application/json
AddOutputFilterByType DEFLATE application/xml
AddOutputFilterByType DEFLATE application/xhtml+xml
AddOutputFilterByType DEFLATE application/rss+xml
AddOutputFilterByType DEFLATE image/svg+xml

# Optional: Handle old browser bugs (safe for compatibility)

BrowserMatch ^Mozilla/4 gzip-only-text/html
BrowserMatch ^Mozilla/4\.0[678] no-gzip
BrowserMatch \bMSIE !no-gzip !gzip-only-text/html
Header append Vary User-Agent
</IfModule>
Once you’re done, you can check if all pages are using it correctly by running a Website Audit in Seobility. You can find this info in the “Pages without compression” report.
Seobility > Website Audit > Reports
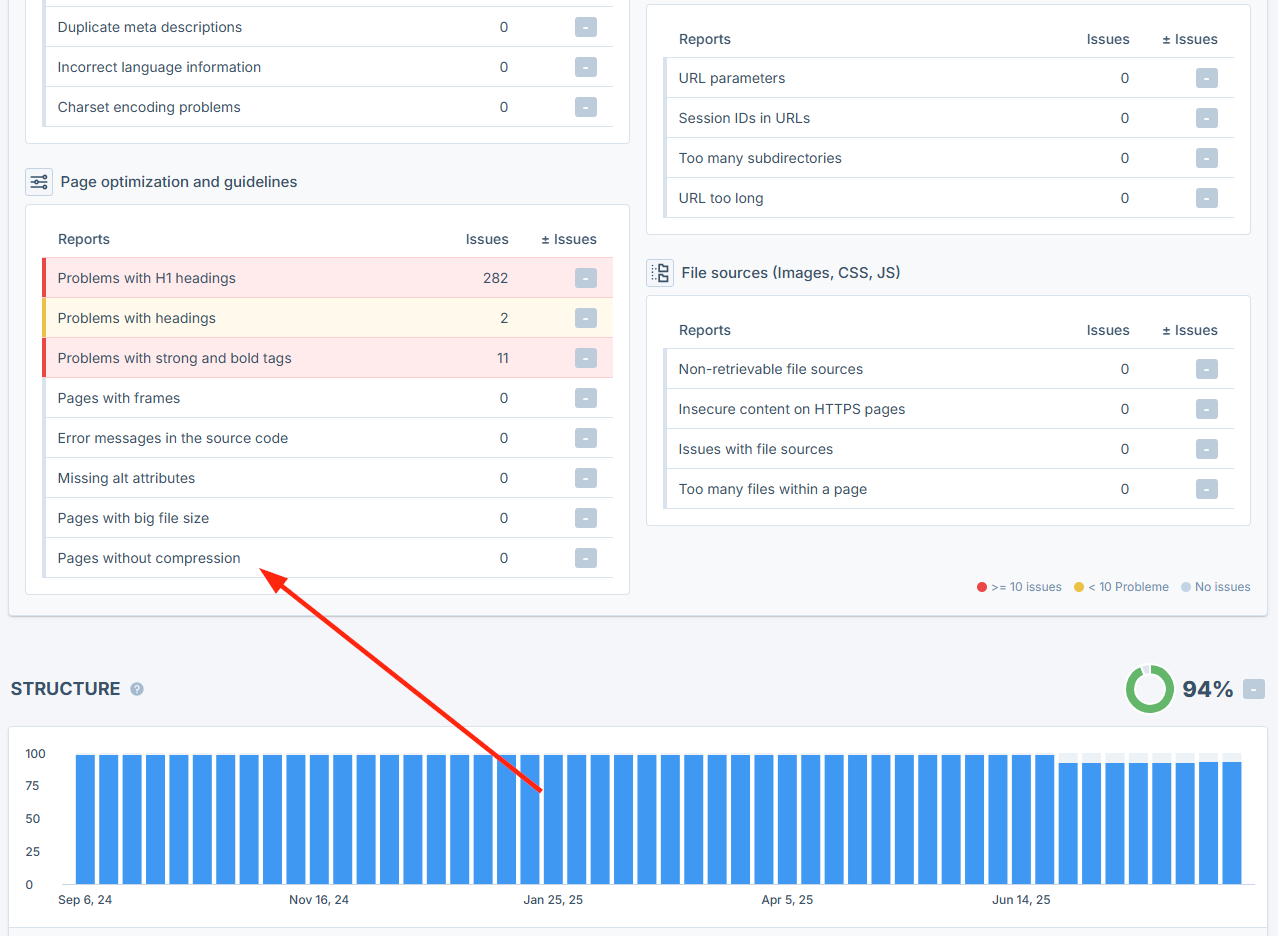
Alternatively, you can use our free SEO Checker to check this for individual pages only.
5. Minify your JS, CSS, and HTML
Difficulty: Intermediate (easy to do, but make sure you test afterwards to ensure everything is working correctly)
Why should you do it?
Comments, new lines, tabs, and other whitespace can be removed from JS, CSS, and HTML files to reduce their size.
How to do it
You can use this free tool to minify your CSS, JS, and HTML.
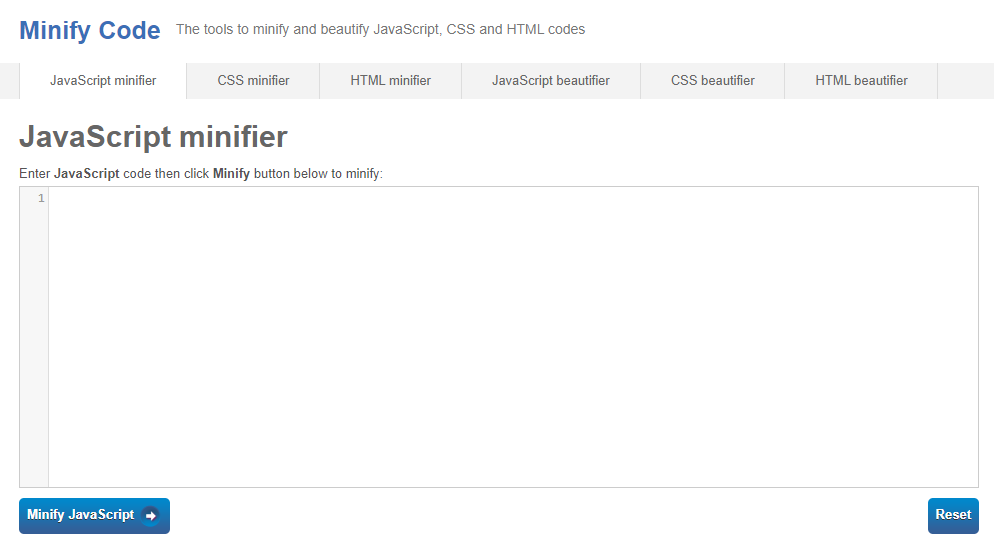
(And if you screw something up, you can also use the tool to “beautify,” i.e., unminify your scripts.)
If you’re unsure which files require optimization, Seobility’s Website Audit will help you identify large files on your website:
Seobility > Website Audit > Reports > Issues with file sources > Filter for: Large file size

Further reading: Why Minify JavaScript Code? (Cloudflare)
6. Defer parsing of JavaScript
Difficulty: Easy (can be handled by a plugin or by manually adding an attribute to scripts)
Why should you do it?
JavaScript libraries are typically included in the header of a page. And by default, when a browser reaches a script, it will need to download the file and “parse” it before continuing to load other content.
This is known as render blocking, and can seriously slow down your website.
Fortunately, it’s easy to fix. And we’ve covered exactly how to do it in our Core Web Vitals guide here.
7. Defer non-critical CSS
Difficulty: Intermediate (slightly trickier than deferring JavaScript)
Why should you do it?
Like JavaScript, CSS is render-blocking.
To improve loading speed, you can move the most important CSS (the styles required to render above the fold content) directly into the page’s HTML code and defer loading the rest until later.
It’s not quite as straightforward as deferring JavaScript (unless you’re using a plugin), but it’s still relatively painless.
How to do it
This web.dev guide covers the process of deferring non-critical CSS in detail.
And we also cover how to do it in our Core Web Vitals guide.
8. Reduce overall web page size
Difficulty: Advanced (combine many tips in this guide + analyze individual requests)
Why should you do it?
What’s the golden rule for making a website load faster?
Make the size of each page as small as possible.
To truly achieve good results, you need to obsess about this and follow as many of the steps in this guide as possible.
Your goal is simple. The smaller each page is, the faster it is to load – so focus on making it as small as possible.
A good goal is less than 1MB, but this may vary for different sites. Just focus on making it as small as possible without affecting user experience.
How to do it
Beyond following the steps in this guide, you should look at everything your page is loading (requests).
You can use Seobility’s Website Audit feature to scan your website for HTML pages that are overly large:
Seobility > Website Audit > Reports

If you find any large pages, GTMetrix can then let you analyze all requests a web page is making.
Look at each single request. Try to discover its source.
Then ask the following question:
“Can my website live without this request? Is it really necessary?”
You’ll find that you can eliminate many of them.

Here are some examples of requests that could be removed if you’re not using them:
- Facebook Pixel, Google Ads, Google AdSense
- Other 3rd party ad scripts or ad tracking scripts (these are particularly heavy)
- Email Marketing tracking scripts
- Disqus Comments (these include 3rd party tracking scripts – you can opt out of these)
- Reduce the number of different Google Fonts you are using
- Google Optimize, Hotjar, or other user tracking or optimization scripts
- FontAwesome icons if they are barely being used
- Map plugins
- YouTube or other embeds
You’ll probably discover, as you go through them, that some requests are larger (and slower) than others.
Make a judgment on whether you can drop them.
9. Host a local version of scripts you can’t eliminate (such as Google Analytics)
Difficulty: Easy to intermediate (simple to do with a plugin, more advanced if you’re doing it manually)
Why should you do it?
While you can control the cache expiry of local scripts (i.e., the time before a browser has to download a new version), external scripts are out of your control.
For example, Google Analytics has a cache expiry of just two hours.
And you’re also relying on the speed/reliability of the external server. Not too much of a concern for most popular scripts, granted, but hey, even Google goes down from time to time.
How to do it
Technically all you need to do is go to the script, grab the code, save a copy, upload it to your own server, then call that local copy in your HTML.
But of course, the external script might change from time to time.
So you’ll want to set up a cron job to pull down the latest version of the script periodically (here’s how to do it for Google Analytics).
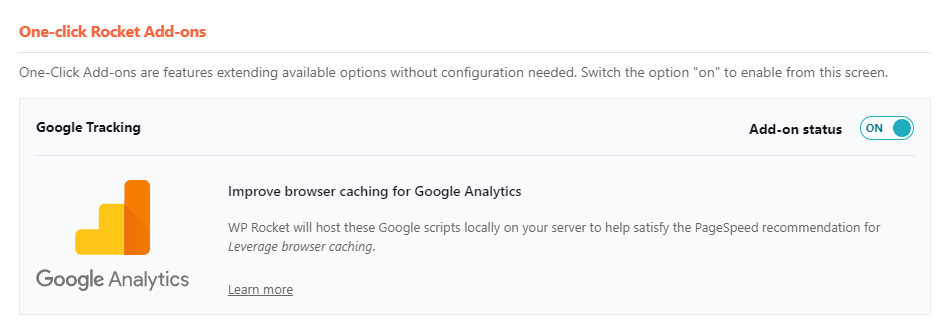
Or if you’re running WordPress, you can either use this free plugin or let WP Rocket handle it for you.
10. Check and fix errors in error logs
Difficulty: Advanced (fixing errors may involve changing underlying code)
Why should you do it?
Sometimes your website might be “struggling” without you knowing it. Most sites are built to be resilient to certain errors, and these errors are silently hidden.
But what’s the effect of these hidden errors?
Poor performance. This is because error handling is resource intensive.
If these errors are generated often, then your site could be taking several performance hits.
How to do it
Errors will vary from site to site.
So you’ll need to go through the areas where errors are being logged to find the issues on yours.
You can check in the following places:
- Error log in your hosting account
- PHP error log in the root directory of your site
- Other areas that store logs / error logs
When you discover errors, investigate further and take steps to fix them.
11. Time delay third-party scripts with Google Tag Manager or Lazy Load
Difficulty: Advanced (time-delaying scripts can affect performance/tracking)
Why should you do it?
Even if third-party scripts can be heavy, some of them are essential for our website. So we can’t eliminate them completely.
But can we improve page speed while retaining these scripts?
Yes, through a method called time-delayed loading.
How to do it
You can delay loading of third-party script through JavaScript (requires development and tweaking of your theme) or through Google Tag Manager.
Make sure to test these changes thoroughly in staging, along with making sure tracking, etc., still works as intended, before going live.
12. Use Prefetch/Preconnect to “warm up” connections
Difficulty: Intermediate (relatively easy to implement by adding the relevant tags to your code)
Why should you do it?
Today’s browsers typically load content and 3rd-party scripts from top to bottom as they encounter them.
But wouldn’t it be great if the browser knew what it would need to load further down the page?
The browser could start “prefetching” those resources, so that once they are needed, they are already available.
Prefetch and prerender tags do just that.
How to do it
Let’s start with prefetch.
This works primarily for DNS requests.
If you know that your website uses resources on third-party websites, a DNS prefetch instruction will start the DNS resolution of that URL, so that it is ready for the connection to be made.
By adding code such as:
<link rel="dns-prefetch" href="//www.googletagmanager.com">
for each third-party script that will be encountered, all of the DNS resolution time will have been completed by the time the script is encountered.
Preconnect works similarly, but it’s more commonly recommended for speed improvements.
Instead of just performing the DNS query, it actually initiates the connection to the third-party site so that it is ready to be used.
There are other instructions we can perform to help the browser including:
- Prefetch or Preload – preloads static resources such as images or CSS/Javascript files
- Prerender – fully downloads a URL to make it ready for accessing.
There is a good guide about each of these commands here.
Other quick tips
Remove unnecessary redirects
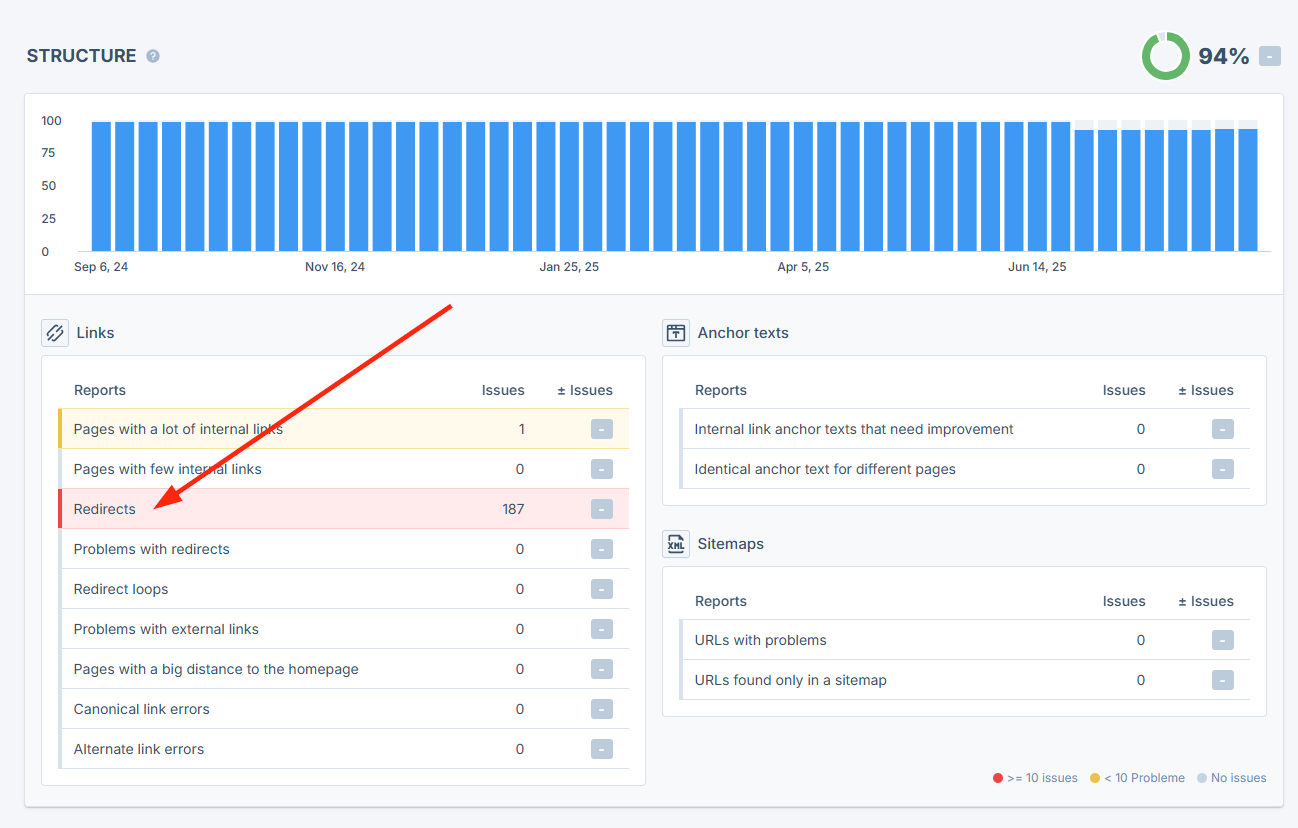
Redirect chains slow down your site by adding extra requests before the browser can reach the final page. Each additional step in a redirect chain increases load time and makes it harder for both users and crawlers to access your content.
Instead of linking to a URL that redirects, you should always link directly to the final destination URL. This keeps your site faster and avoids wasting crawl budget.
Seobility’s “Redirects” report (available in the Website Audit) lists all pages on your site that link to redirecting URLs. This makes it easy to spot and update problematic links so they point straight to the target page.
Seobility > Website Audit > Reports
Optimize fonts
Self-hosting fonts, preloading them, and limiting the number of variations (weights/families) can help reduce load times.
Limit plugin/theme/third-party integration bloat
Whether you’re on WordPress, Shopify, or another CMS, keeping plugins up to date and ensuring you’re only using themes and plugins you actually need can help keep your load times snappy.
Optimizing WordPress?
WordPress is the most used CMS in the world and is used on more than 40% of all websites on the internet.
It comes with a ton of benefits, like the ability to use themes and plugins to improve website functionality quickly.
Since it’s so commonly used, and there are speed optimization tips specific to WordPress sites, we’ve created a separate guide for it.
In our guide to optimizing WordPress page speed, we cover those changes you can make on WordPress sites specifically to make your site blazing fast.
Wrapping Up
Speeding up a website can span from simple tweaks and changes to significant infrastructure changes to the underlying technology.
But they all count. And the more you implement, the faster your website will be.
Your ultimate aim should be to get your website to load in under 2 seconds. And by following the tips in this guide, along with those in our Core Web Vitals guide, that’s an achievable goal.
The result will be happier users, happier crawlers, and more traffic.
You can sign up for a free 14-day trial here to test how Seobility can help you check your website for large file sizes, slow server response times, unnecessary redirects, and many other potential website speed issues.
Any questions? Just leave us a comment below. And hop on our mailing list for more actionable SEO tips, tutorials, and advice.
This article was originally published on February 9, 2021, and has been completely updated by the Seobility team on January 13, 2026.


hey David,
Amazing manual on speeding up my site 🙂
Thank you!
Alex
Hey Alex,
glad you found this useful for you!
David
Great insights! I of the most well-written articles on page speed optimization that I have found.
Hey Nardi,
thanks for the compliments, we do try to bring you great, actionable articles!
Cheers
David
[…] Read the complete article at https://www.seobility.net/en/blog/page-speed-optimization/. […]
Some great tips here! Page speed is really tricky because it’s one of those things that degrade slowly over time and you never realize when and how you went from 1.4 seconds to 14 seconds. 😂 “Oh, we’ll hire someone to fix it later” also doesn’t work well because the pages are messed up way too much. Better to be disciplined and keep the record clean always.
Yeah, very true.
It tends to get pushed to the back burner in favour of other things, until it becomes too bad.
At that point, it will be much harder to make it work well.
It’s always better to design/plan for speed, than try to repair the damage once it’s done.
David
Hi David,
Cool article and thanks for mentioning my Google Analytics plugin, CAOS. 🙂
I recently switched to a LiteSpeed server with QUIC.cloud CND. The speed is insane. Also, the LSCache plugin for WordPress makes speeding up your website a breeze, but like you said: in itself, LiteSpeed’s performance is sooo much better compared to Apache.
I can’t believe I never thought about disabling PHP modules. I run a pretty tight ship already, but that’s an area I never paid attention to! Thanks!
Tweeting this 😉
Hey Daan,
always happy to feature good tools that work nicely 🙂
LiteSpeed is amazing, out of the box it is great, but if you tweak it, you can push the speed even further, definitely highly recommended. I’ve used it both for Joomla and WordPress and was impressed with both.
Re PHP modules, it’s another one of those small things that can help you squeeze that little extra juice!
Glad you found this useful!
Cheers
David
I am not a devloper. How i engaged someome to increase the speed of my website. My website is devloped on PHP larawel
Fiverr would be a great place to start and show them this article.
Another rather important point on acceleration is optimization and compression of images on the site. You may manually optimize each picture (through Photoshop for example), or automatically (through special services).
We did mention this in the article Alex 🙂 You can see it as point 2 in the technical tips!
[…] compresses your image file size to optimize your site speed while still maintaining a high-quality […]
hi david,
unfortunately discovered your content-piece quite late but… I really like your approach of “what”, “why” and “how”. thanks for sharing. I found some factors I didn’t know and can now use for some projects.
I think it would be great to add “how much does this do” – but of course you can measure that yourself.
have a good & successful 2022
Thanks for your feedback, Michael! We’ll definitely keep this in mind for a potential future update of this article.
Thanks for writing on this topic. Recently Google Search console shows errors of clickable elements close together. How to fix it? Any suggestion?
Hi Sabbir, here’s a great article on how to fix this issue: https://kinsta.com/blog/clickable-elements-too-close-together/
Hi David,
thank you for the great article on performance optimization. Lately I’ve been hearing more and more that the AVIF format for image compression is supposed to be even better than WebP. How do you see the future of WebP – or does it perhaps make sense to skip WebP and deal directly with AVIF? Any opinion on that?
Cheers
Nikolas
Hi Nikolas,
Thanks for your comment! AVIF and WebP are both image formats that are recommended by Google, so both are good choices to reduce the file size of images. However, you should note that AVIF isn’t supported by all browsers yet.
Thanks for the detailed resource 🙂